This tutorial is to help you learn how to make certain spots color after you have converted a color photo to black and white. Ok, after you have the picture that you want to work on, open it in photoshop:
1) Open a new Channel Mixer adjustment layer then click to check the box that says Monochrome to make the picture black and white.
2) Make sure you have Channel Mixer Adjustment Layer selected in the Layers menu.
 3) Click on the Brush Tool (make sure the colors you are working with are black and white).
 5) Using the color black, carefully brush over the parts of the picture that you want to be in color, (you may need to adjust brush sizes for the small details). When you do this the parts that you brush should turn back to color.
 2) Go to Filter>Render>Lighthing Effect and use this settings:
 This is what I got:
 3) Now add a simple inner shadow:
 You should have something like this:
 4) Get a round simple 1 px brush and draw some lines like I did (hold shift to make them straight).
 Set blending mode to color dodge and lower the opacity to 70%.
 5) Make a new layer and a selection like below filled white. Now lower the opacity to 12%.
 6) Add a simple Drop Shadow:
 7) Add your text and you are done. This is my result:

 5) Draw a line from the top left cornor the the bottom right corner. Make sure that your line is not longer than your image! Your line must be precisely from the one corner to the other!
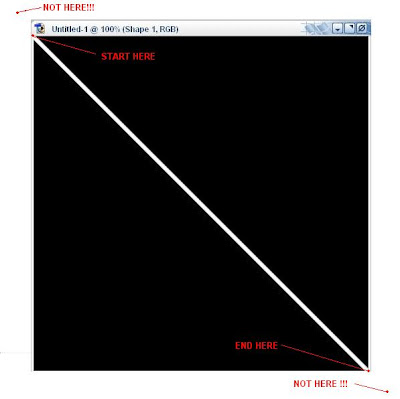 6) Now draw a line from your top right corner to your bottom left corner.
 7) Now draw two more lines like I did below (hold shift while you draw the lines)
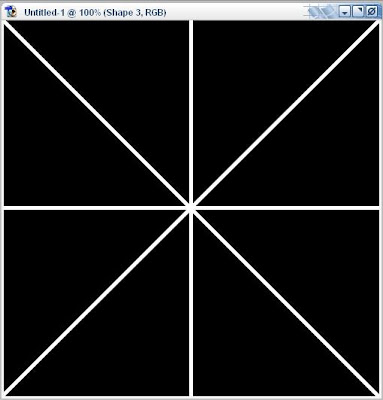 Use your Move Tool to make all the lines cross at 1 point.
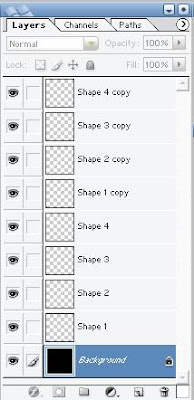
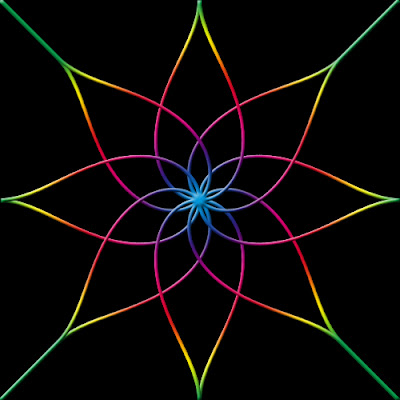
 Now you should have this:
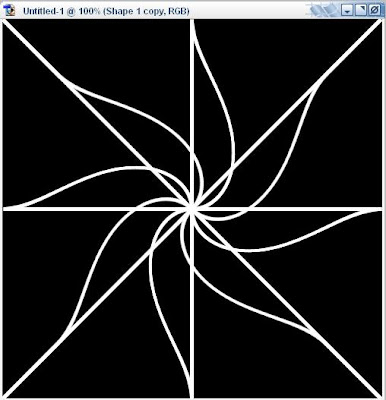 12) Select your Shape 1 Layer and go to Filter > Distort > Twirl. This time use -90. You should now have a nice flower.
 13) Right click your Shape 1 layer and click Blending options, use following settings:
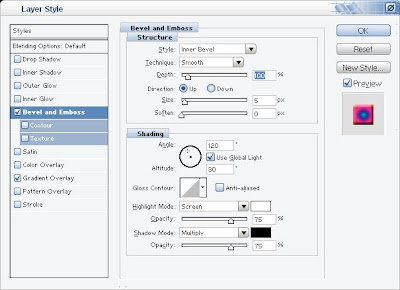
 14) Right click your Shape 1 Copy layer and click Blending options, use the same settings as above.