Step 1 - Create the Text
Start with a new image 1000x500 and fill the background with black.
Set your foreground color to #042040.
Create a new text layer and center it.
I used a font size of 220 pt.
Set your foreground color to #042040.
Create a new text layer and center it.
I used a font size of 220 pt.
 Step 2 - Outside Glow
 Create a new layer , then double click on that layer (in the layers palette), and name it outside glow, and then move it bellow the text layer.
 Step 3 - Small Lines
Create a new layer above the text layer, and name it sml lines.
 Step 4 - Gaussian Blur
Hold down the CTRL key and click on the the text layer in the layers palette to select it.
Change your foreground color to #16406F then fill the selection with it by pressing ALT + BACKSPACE.
Deselect CTRL+D, and then Gaussian blur the layer 20 pixels.
Filter » Blur » Gaussian Blur » [ Radius 20 Pixels ].
 Step 3 - Small Lines
Create a new layer above the text layer, and name it sml lines.
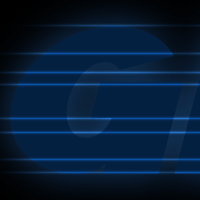
Select the single row marquee tool by clicking and holding down the mouse on the Marquee Tool in the ToolBox, untill the other tools apear, then selecting it.
Hold down SHIFT and click several different times to create several differt line selections.
Hold down SHIFT and click several different times to create several differt line selections.
After you have several line selections, fill them with white.
 Step 4 - Gaussian Blur
Gaussian Blur the layer by 1 pixel.
Filter » Blur » Gaussian Blur » [ Radius 1 Pixel ]
Filter » Blur » Gaussian Blur » [ Radius 1 Pixel ]
Duplicate the current layer. CTRL + J. Then merge the two layers down together CTRL + E.
Set the blending mode to Color Dodge, then open the blending options by right clicking on the sml lines layer and selecting blending options.Set the fill on the layer to 80%.
 Step 5 - Medium Lines
Create a new layer above the sml lines, layer and name it med lines.
 Step 6 - Large Line
 Step 7 - Outline
 Step 8 - Gaussian Blur
 Step 9 - The Darkness Inside
 Step 10 - Motion Blur

 Step 5 - Medium Lines
Create a new layer above the sml lines, layer and name it med lines.
Make a selection, using the Rectangular Marquee Tool (M or SHIFT + M) across the whole image, that is 5 pixels high.
Fill the selection with white CTRL + BACKSPACE
Deselect CTRL + D, then Gaussian blur by 3 pixels.
Filter » Blur » Gaussian Blur » [ Radius 3 Pixel ]
Set this layers blending mode to Color Dodge, and also in the blending options uncheck Transparency Shapes Layer.
 Step 6 - Large Line
Create a new layer above the med lines layer and name it large line.
Make a selection, using the Rectangular Marquee Tool across the whole image, that is 15 pixels high.
Fill the selection with white CTRL + BACKSPACE
Deselect CTRL + D, then Gaussian blur by 5 pixels.
Filter » Blur » Gaussian Blur » [ Radius 5 Pixel ]
Set this layers blending mode to Color Dodge, and also in the blending options uncheck Transparency Shapes Layer.
 Step 7 - Outline
Create a new layer bellow the text layer and name it Outline.
While holding down CTRL, click the text layer to select it.
Expand that selection by 3 pixels.
Select » Modify » Expand [ Expand by 3 Pixels ]
Then fill the selection with a light gray. (#B5BBC2) Press ALT + BACKSPACE to fill, then press CTRL + D to deselect.
 Step 8 - Gaussian Blur
Gaussian Blur Outline by 2 pixels.
Filter » Blur » Gaussian Blur » [ Radius 5 Pixel ]
Set the blending mode on the layer to Color Dodge, and also in the blending options uncheck Transparency Shapes Layer.
 Step 9 - The Darkness Inside
Create a new layer above the the text layer and name it DarknessInside.
While holding down CTRL, click the text layer to select it.
Contract that selection by 5 pixels.
Select » Modify » Contract [ Expand by 3 Pixels ]
Next, fill that selection with black, by pressing D to reset the colors, then ALT + BACKSPACE to fill with the foreground color.
CTRL + D to deselect, then Gaussian blur the layer 4 pixels.
Filter » Blur » Gaussian Blur » [ Radius 4 Pixel ]
 Step 10 - Motion Blur
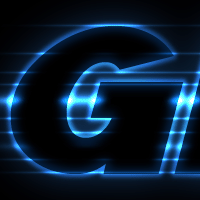
Ok now the fun part. Select the outside glow layer, and then motion blur it as much as you want. On mine i used 200.
Filter » Blur » Motion Blur [ Distance 200 Pixels Angle 0° ]

No comments:
Post a Comment