We're going to try to get a really metallic chrome effect on our text, using curves and other features in Photoshop. Start off with a large canvas, the larger the better - I'm using 800x800. Make some text and have it a light-medium grey, in the example I'll use #B3B3B3. Start off by using a nice big bevel and emboss with settings similar to those bellow. As usual, the size should be suitable for the size of the image; try to make it look like the example.


Step 2:
Now we need to rasterize our layer. Create a new layer by pressing ctrl/cmd + shift + N, then link the new layer with the text layer, and press ctrl/cmd + E to merge it. This will rasterize our text layer. Now we need to adjust the image using curves - press ctrl/cmd + M to open the curves menu, then enter a nice even zig zag, as shown bellow.

 Step 3:
Go Image > Adjustments > Variations, set the slider at the top to one notch from the bottom, and then click once on the 'Current Pick' box, once on the 'More Blue' box, and then once on the 'More Green' box - now click OK. Press ctrl/cmd + M again to open up the curves menu, and enter a slightly different curve like bellow. Now add a drop shadow using the default settings by going Layer > Layer Style > Drop Shadow and clicking OK.

 Step 4:
Now use the layer styles again (Layer > Layer Styles) to add an inner glow using the settings in the first image bellow. Go to layer styles again and this time add a second bevel and emboss, with the settings from the second image. For the next stage, we need to create a selection - hold ctrl/cmd and click on the main layer in the layers palette. This will select the letter/text - now go Select > Modify > Contract and enter a value of 3. Now go Select > Feather (ctrl/cmd + shift + D) and enter 3 again.


 Step 5:
 At the bottom of the layers palette, click the 'Create New Fill or Adjustment Layer' button - a circle half black and half white - and click 'Gradient Map'. Click the arrow at the side of the dialogue box that appears (see the image), and load the file 'Metals'. Apply the gradient in the bottom left (black > white > black - "Steel Bar"), then set this layer's blending mode as 'overlay'. This should give a similar effect to that seen opposite. If not, try the tutorial a few times - there are several variables such as the curves input that can make quite a difference, and it takes some practice!


 Step 2 - Outside Glow
  Step 3 - Small Lines
 Step 4 - Gaussian Blur
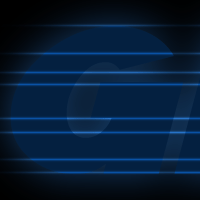 Step 5 - Medium Lines
 Step 6 - Large Line
 Step 7 - Outline
 Step 8 - Gaussian Blur
 Step 9 - The Darkness Inside
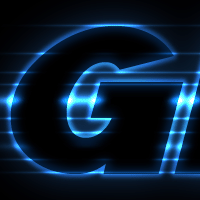 Step 10 - Motion Blur
 Step 2: - Vertical Wind
 Apply the Ripple Filter ( Filter > Distort > Ripple ) to make the light wavy.
 Open the Hue/Saturation window ( Image > Adjustments > Hue/Saturation ) and press Ok with the default values.
 Step 4: - Final Touches
 Step 7: