Step 2
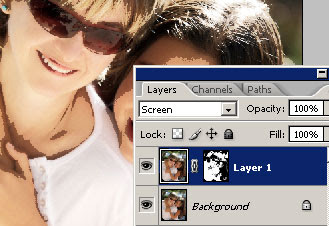
Duplicate the layer (Layer> Duplicate Layer or Ctrl+J) and change the blending mode of the new layer to Screen.
 Add a layer mask to the top layer (Layer> Layer Mask> Reveal All). Make sure that the layer mask is selected.
 Creating the Mask
In this section, we'll be editing the layer mask to mask out the effect from the shadows.
Step 3
Use the Apply Image tool to apply the Background layer to the layer mask. To do this, open the Apply Image tool (Image> Apply Image) and change the Layer to Background and click OK.
 Step 4
Hold the Alt key and click on the thumbnail of the layer mask.
 Step 5
With the layer mask still activated, use the Threshold tool (Image> Adjustments> Threshold) and adjust the slider to define where the bloom Photoshop effect will be visible.
 Adjusting the Effect
We're now ready to edit the effect. This section is where we'll see the bloom effect in action.
Step 6
Click on the thumbnail of the layer (not its layer mask) to deactivate the layer mask.
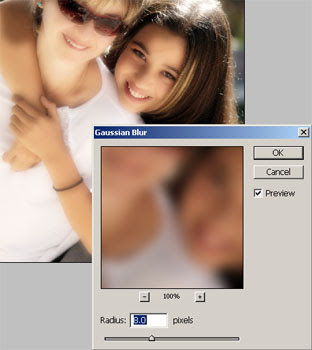
 Step 7
Open the Gaussian Blur filter (Filter> Blur> Gaussian Blur). Ensure that Preview is enabled and increase the radius to achieve your desired effect.
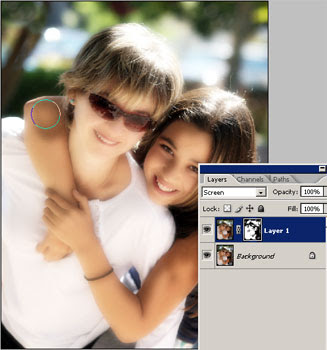
 Step 8
Inside the Layers pallet, click on the thumbnail of the layer mask to activate. Use the eraser tool (E) to erase the bloom Photoshop effect wherever you do not want the effect to appear. Use the brush tool (B) to add areas where you would like the effect to appear. To start, use a brush or eraser with a low hardness and an opacity of around 50%.
Press the "[" and "]" keys to adjust the size of the brush quickly.
 Final Results
 This effect creates a similar glow effect as the diffusion effect. The diffusion effect is more natural while the bloom effect is stronger and has more noticeable edges between the shadows and highlights. If you feel the Bloom effect is too strong for your photo and you want to preserve more details, try using the classic diffusion effect.
6 comments:
Good effect adjustment . This is a admirable post . A lot of thanks for this post , thanks .
Your post is very imformative.Thanks for sharing your helpful post.
clipping path | multiple clipping path | gost maniquine service | photo background remove | photo color correction | photo jewelry retouching | photo masking service
I highly admire your post. This is really fascinating. Thanks for sharing.
Clipping Path Service
Image Masking Service
E-commerce Product Photo Editing
Image masking is a way to remove certain elements of an image. It can be used to hide items such as people, text, or logos so that they are not visible on the final product. image masking service are used by brands that want to use an existing logo but need it in a specific size, shape, or color. By using image masking services, you can ensure that your logo is visible in all of the products that are created.
This post was packed with insights and I feel so much more informed on the topic thank you for sharing your expertise
Visit Here: Wedding Photo Retouching Services
I appreciate how you approach each topic with empathy and understanding it makes your blog feel like a supportive community
Post a Comment