Step 1:
Create a duplicate of your image.
Step 2:
Delete everything except the skin. Erase the detail sections with 30-50% opacity eraser.
 Step 3:
 Selection the layer (CTRL+click on layer) and run >Filter>Noise>Median. Step 4:
Step 4: Change the Layer Mode to Luminosity - The Opacity is at 100% and needs to be turned down for a more realistic look.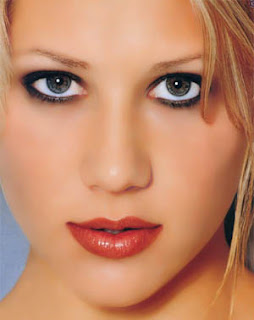 Step 5:
 Extra Tip #1
Step 5:The Opacity has been brought down to 65%:
Extra Tip #1You could also duplicate the "skin" layer and change the Layer Mode to Soft Light for a warmer feel.
 Extra Tip #2
Or create an quick tan by changing the second skin layer to Multiply. (bring the Opacity down to less than 50%):

5 comments:
What a great retouch . Looking spanking and it's just mind blowing . You are very experiences there is no doubt .
You have made this photo so attractive by using an editor. Just great.
I really enjoyed your blog Thanks for sharing such an informative post.
what a great retouching effect. I loved the easy tutorial. I will definitely try it.
Clipping Path Service provider company
photo retouching services
Image Background Remove Blog
How to do clipping path service
Ghost mannequin service
Has given many beautiful tutorials. I like it a lot. This tutorial will benefit many people. Thanks for sharing the post
Clipping Path |
Clipping Path, shadow-service |
shadow service |
Post a Comment